

Ready To Block
SET UP DETAILS
Here are a handful of things you can do to make placing nerve blocks easier and more efficient. Let’s start with [nonmember]…
REGISTER for FREE to become a SUBSCRIBER or LOGIN HERE to see the full article!
[/nonmember]
[wlm_ismember]
the prep. I prefer tinted prep that is alcohol based.This allows a very clear border for what is sterile and what is not. Prep an extended area greater than the size of the hole in the drape. This leads me to a point about typical drapes. First, complain to your kit or tray rep that the circle cut out of the drape for the nerve block is too small. Beyond that, I recommend NOT to stick the drape down in some particular spot. As soon as you do that, you will realize that you needed it over in one direction or another a half of an inch. This is especially true of ultrasound guided blocks where you may need to scan an extended area to see the complexity of the surrounding anatomy to recognize the course of the nerves in question and the optimal point at which to access it. With the drape not stuck to the patient and your extended tinted prep, you can safely move the drape a little this or that way to better accommodate the path of your probe.
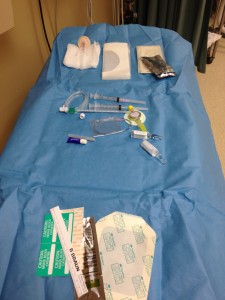
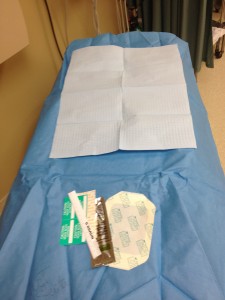
I think it is always helpful to open your tray and set things out in the same pattern every time. This includes what you open first and last as well as where you set things. For example, I set things out from one side to the other with prep stuff beside local and block needles with closing stuff together beside them. This prompts me to do the next task without forgetting some minor detail and allows my assistant to anticipate my moves, optimizing their efficiency as well. For example, have them connect to your extension tubing or side port first and then slip on the probe cover or the other way around, but pick a system over time. This also keeps me on task when time is short. I always get every single thing out and open before I start, so that I don’t have to do wild contortions with one hand as I try to hold my other hand still with some process that has now been interrupted.If there will be any time between opening and using, cover the items in sterile fashion as below.
I have mentioned hand positioning for ultrasound in other posts, and recognizing where your hands are going to be, select a reasonable place to squirt out all of your sterile ultrasound gel. Do not squirt it all where the block is likely going to be placed. Find a distant site that you can reach with your probe hand. Dip your probe in the gel like dipping your french fries in ketchup, getting just as much as is presently needed.
Make sure the ergonomics are optimized before you take off. Adjust the height of the bed so that your hands are comfortably in front of you. Position your ultrasound machine directly in front of you, so that you do not need to crank your neck to see. Make sure your prep table is at an acceptable height and close enough to you so that you do not need to stretch too far for the next item on your tray. Lastly, before you get sterile, make sure that the patient is in optimal position for your block and that miscellaneous straps and cords are away from your intended field and are not in danger of falling back into it just as you get started.
[/wlm_ismember]