

ANTERIOR SCIATIC
I think that this is the first nerve block that I have introduced on this website where I will not say “this is an easy block that you should start on early in your course of learning ultrasound nerve blocks”. Again, it will certainly come to you, but it is not the easiest to perform ‘right out of the gate’. This block requires, at times, several additional skills and a little more understanding to become proficient…and not pull out your hair and just quit. It is one of the very few that I will commonly use nerve-stimulation to confirm my needle position. At the same time, there are some fortunate anatomical circumstances and ultrasound cues that can actually ‘make up’ for some of the difficulties of this nerve block approach. Once you get this one down, it makes the set up for the combined femoral/sciatic block easier since the patient can remain supine, and you can do a single prep for both blocks. Read on, and I will try to give you some tips and tricks that will hopefully help you to continue after this sometimes very elusive prize.
As many people are getting into continuous blocks with the femoral nerve block for TKA’s, I will make several recommendations with this circumstance in mind. If that is the case, I will say that you will be looking to combine one of the easiest blocks with one of the toughest blocks. The bad news is that if you focus on this as your second block to master just because it is available, the progress will likely be slow and results will be variable for a more extanded period of time. The good news is that you likely will have many cases available to get more and more familiar with it (high repetition in a short period of time is one of the best teachers!), and once you get it, you are going to expand to other blocks like a house on fire. Further, there is low pressure to be ‘excellent’ at this block immediately since it covers such a relatively small portion of the pain for the TKA (if you nail it, kudos to you for the ‘bonus’, but if you fail, the femoral block was still the work horse…and this would’ve just been a ‘bonus’ not realized -not a ‘failure’ as such). Your basic choice here is to either (1) suck it up and work hard to incorporate this more difficult approach because ultimately it will be more convenient to set up or (2) incorporate an easier approach to the sciatic ‘in the meantime’ while you more slowly gain expertise in the anterior approach. See my Tip of the Week under the tab ‘THE ‘RIGHT’ WAY’ and the tabs above for the POPLITEAL and SUBGLUTEAL approaches to read more about this strategy.
There are a few reasons why this is such a tough block to master with ultrasound. First, the obvious one is that it is a ‘deep’ block. You really need a lower frequency curved probe to do this one well (but, yes, there are a few tricks that will help you to do it with a high frequency probe -or at least begin to become familiar with it – if that is all that you have right now). A deep block generally requires a steeper angle with your needle relative to the probe, limiting your view of the needle and requiring some tactile cues and sometimes a few tricks. Being deep (‘very deep’ with some of our patients), this also can make visualizing the nerve itself very difficult. Further, depending on exactly how proximal or distal you look, the nerve is surrounded by different muscles which can confound you if you are expecting one view and get one that is much different. The relative small size of the femoral vessels seen with the lower frequency probe set to 10 cm or so always bothered me as I started doing this block as I was always fearful that I would pierce them (or the femoral nerve for that matter) in my descent toward the sciatic nerve.
Beyond being deep, it can be very difficult to make the sciatic nerve respond to electrical stimulation, especially with a more blunt Tuohy needle which doesn’t penetrate the thick connective tissue covering and epineurium as easily as a sharper needle. So, though I said above that I utilize nerve-stimulation to confirm my needle position (stimulating the nerve AND directly stimulating muscles), I know not to be thrown off by a lack of confirmatory stimulation. I will utilize other cues and experience to confirm my location when the stimulation evidence is lacking.
Remember the concept of
[wlm_ismember]
ANISOTROPY that comes into play here. You will only see the nerve well as you approach it at 90 degrees; otherwise, it will completely disappear. Rocking the probe fluidly back and forth will allow you to catch it at the best possible angle. In addition to trying to recognize the nerve just below the calculated underside of the femur, you should also be looking for a white line around this depth (below the mass of adductor muscles) which represents the the potential space between the adductors and the gluteus maximus muscles. This is where the sciatic runs. This view is less clear as you go distally (or even rock the probe to view distally) past the ishial tuberosity. At this point, the hamstrings become visible, and the gluteus falls away laterally. When you can see the lesser tuberosity of the femur, this is likely the view that will be visible.
Sometimes, you will end up with a trajectory with your needle that will keep you from ‘landing’ on the sciatic. If you are able to recognize when you are between the adductors and the gluteus, that is just as good. Using small boluses after I feel the ‘pop’ out of the adductors, I watch for the accumulation of dark-appearing local to begin filling this space betwen the aformentioned muscles in a horizontal line. Seeing local within either muscle alerts you to change the depth of your needle for the more appropriate spread. This will keep you from macerating muscle tissue with multiple redirections and reinsertions of your needle.
Here’s another trick that I use if my ultrasound image is suboptimal. When I get close to the deepest part of the adductor, I turn on the stimulator at 0.5 mA and ask the patient if they can identify the twitch in their leg. I may increase the mA if needed, trying not to alarm or cause pain to the patient. As you advance the needle, watch for the change in muscle stimulation from the adductors to the gluteus. Patients can usually recognize this change in stimulation from the leg to the buttocks as well. Along with the ‘pop’ sensation, this will help guide your initial injection of local as you identify this plane. If you see local on either side of the sciatic nerve (above and below or medial and lateral, you have found your target.
As you move toward mastery (or at least ‘reasonable proficiency’) of this block, try to take it in steps. First, just take a few extra seconds to scan medially with the linear probe you already have out after doing your femoral catheter. Begin to recognize the pattern of femoral vessels and femur. Try to make out the sciatic nerve and the typical depth by the femur. Rock the probe looking for the plane between the muscles. As time allows, begin to explore with the low frequency probe. When you are comfortable with identifying the ultrasound anatomy to some degree, numb the skin and turn on the stimulator. Try the block as primarily a nerve-stimulation technique, taking what cues the ultrasound gives you. Abort if it is taking too much time or too many passes. Remember to enter the tissue with a ‘constant, controlled’ pace so the needle tip is easy to follow by tissue distraction. When the ultrasound shows you are probably there, inject and watch the spread. Begin to follow your patients’ perceptions of pain in the posterior knee, sensations in their foot and the use of opioids intraoperatively (and why and when) and post-operatively.
A point that I haven’t made before on this website involves the use of bupivacaine for this block or the subgluteal sciatic. Ropivacaine 0.5% (my typical choice) may still allow for reasonable muscle strength, but bupivicaine 0.5% will knock out the foot all night. This will get your surgeon’s attention the next day as they evaluate the common peroneal nerve function…and you may get a call for reassurance about that. If you use bupivicaine, I would use 0.25% and not a big dose. Beyond scaring the surgeon, a weak or numb foot WILL cause problems with immediate rehab. I don’t care about quadriceps weakness at all as a cheap immobilizer will allow them to get up and walk; if they have any proprioceptive loss in their foot, they can misjudge a step on the walker and hit the deck. This is why I do a continuous femoral block but only a single injection sciatic block. I will address more about ‘fall risk’ in a Tip of the Week soon.
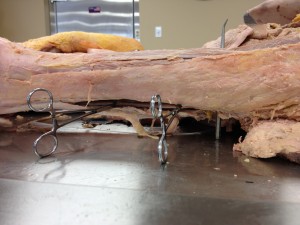
The cadaver pictures below illustrate the relative position of the sciatic nerve below the femur and the position of an inserted needle. Note in the first image that the gluteus muscle has been pulled away near the origin and hangs below from the insertion on the posterior femur. The left is caudal, and the right is cranial. The femur is covered in superficial tissue but can be made out deep to the iliotibial band (reflected). Just below the greater trochanter, the sciatic nerve can be visualized. Though not seen in this image, the adductor magnus is above the sciatic nerve, medial to the femur.

[/wlm_ismember]
[wlm_ismember]
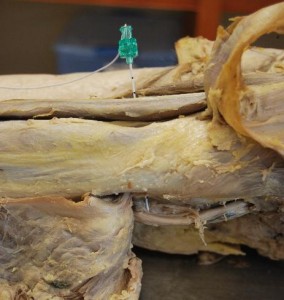
The last cadaver image shows a needle touching the anterior surface of the sciatic nerve. The muscle just below the second black centimeter mark just below the green hub is the sartorius muscle. The distal needle can be seen emerging below the femur adjacent to the adductor magnus approaching the sciatic nerve. Note the small slip of gluteus muscle attaching just caudal to the needle. At this level, the gluteus muscle would be seen as a mass just lateral to the nerve with the proximal origins of the three hamstring muscles medially. Imagine the ultrasound image as the probe is moved cranially from this location. The lateral mass of the gluteus would begin to extend medially as well as the hamstrings disappear from sight. This may be easier to visualize if you picture the gluteus muscle in this image being reattached at the origin by rolling it back into place. Recognizing this relationship is another way to recognize the sonoanatomy while scanning. I must admit that I have been fooled before by a thick layer of subcutaneous fat beneath the gluteus which I mistook for the gluteus itself. Scanning (rocking) distally will prove what you are looking at if there is any doubt.
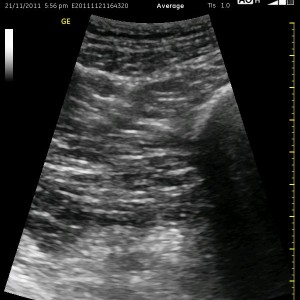
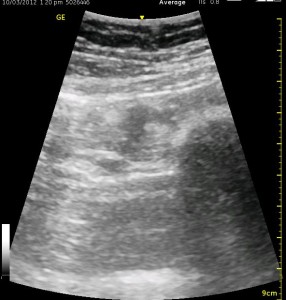
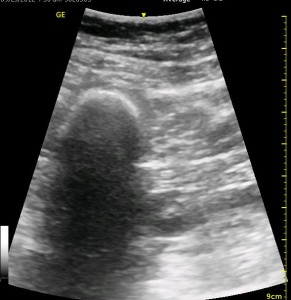
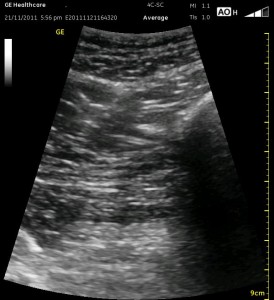
The following ultrasound image shows typical relationships of the sonoanatomy of the anterior sciatic nerve block. The femur is at 4cm on the right (lateral) of the image seen as a bright white horizontal line. Typically, there is a bone shadow below it, though there is some artifact below the femur here. The femoral vessels are seen between the 2cm and 3cm marks just to the right of center as a darkened area. They really can be determined by pausing for the appearance of arterial pulsation and venous compressibility. The adductors are seen to the left of the femur as a darkened area. Just deep to this between the 6cm and 7cm mark is a brightened rectangular shape, the sciatic nerve. The brightness fill fade with rocking of the probe over it. The nerve can be approached from the medial or lateral aspect of the probe, and moving the probe medially will sometimes allow for a better trajectory.

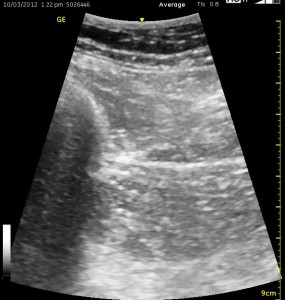
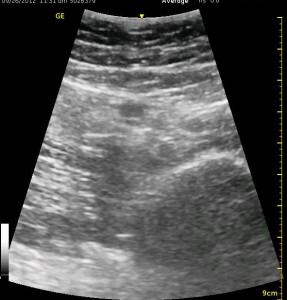
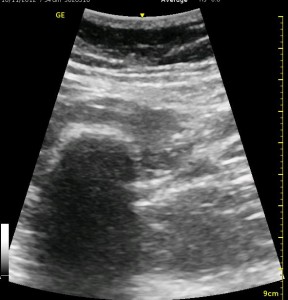
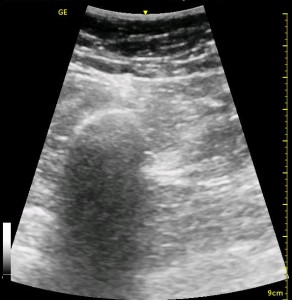
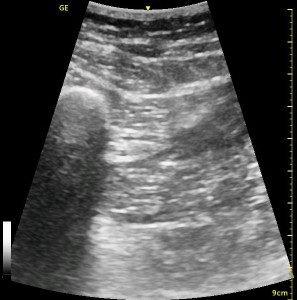
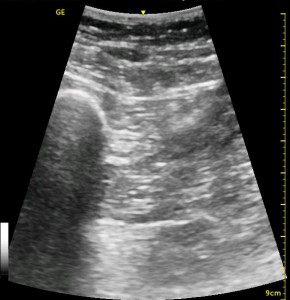
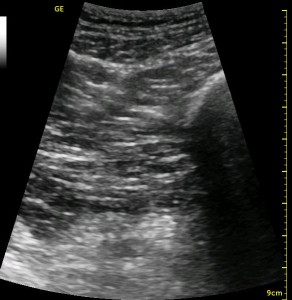
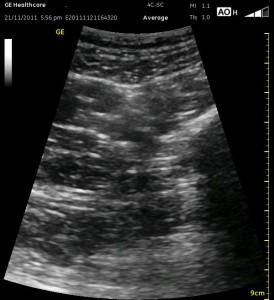
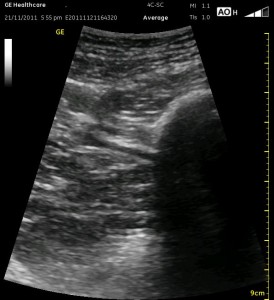
The image above is not an obvious one, and I did that on purpose. You have to get used to the idea that you will not always have a ‘super distinct’ image with this approach, and you will often need to use a number of additional clues to find your target and then to put local around it. I think the only way to really get a handle on being able to identify the basic elements is to look at several images over and over, so I have provided several below for you to use for practice. Note that the sciatic nerve will ‘poke out’ from behind the femur to different degrees depending on your orientation to the femur as well as to how far up or down the femur you go. It will be seen more if you are proximal. See how well you can identify the structures in the images below.
[/wlm_ismember] [nonmember]…
REGISTER for FREE to become a SUBSCRIBER or LOGIN HERE to see the full article!
[/nonmember]
See Also: Ultrasound Tip #2, The ‘Right’ Way