

SUBGLUTEAL SCIATIC
 The subgluteal approach is where I first started blocking the sciatic nerve for total knee arthroplasty (TKA). Since I usually performed the subgluteal sciatic nerve block as a single injection (and some of the extra steps for a continuous block could be omitted) after the continuous femoral block was already secured in place, it wasn’t a big deal for me to turn the patient on their side to do this approach, and it usually was a straight forward view on ultrasound. If you want to use the subgluteal approach for your TKA’s, you may find it more convenient to position the patient laterally, perform the block, then roll them back into the supine position for the continuous femoral block. Ultimately, I switched to the Anterior approach for the convenience of not having to reposition a somewhat sedated patient into the lateral position, and I owe my conversion to the Anterior approach to the continual pressure put on me by my Anesthesia Tech assistant, Dave Sundy, but I will discuss more about that in the Anterior Approach section.
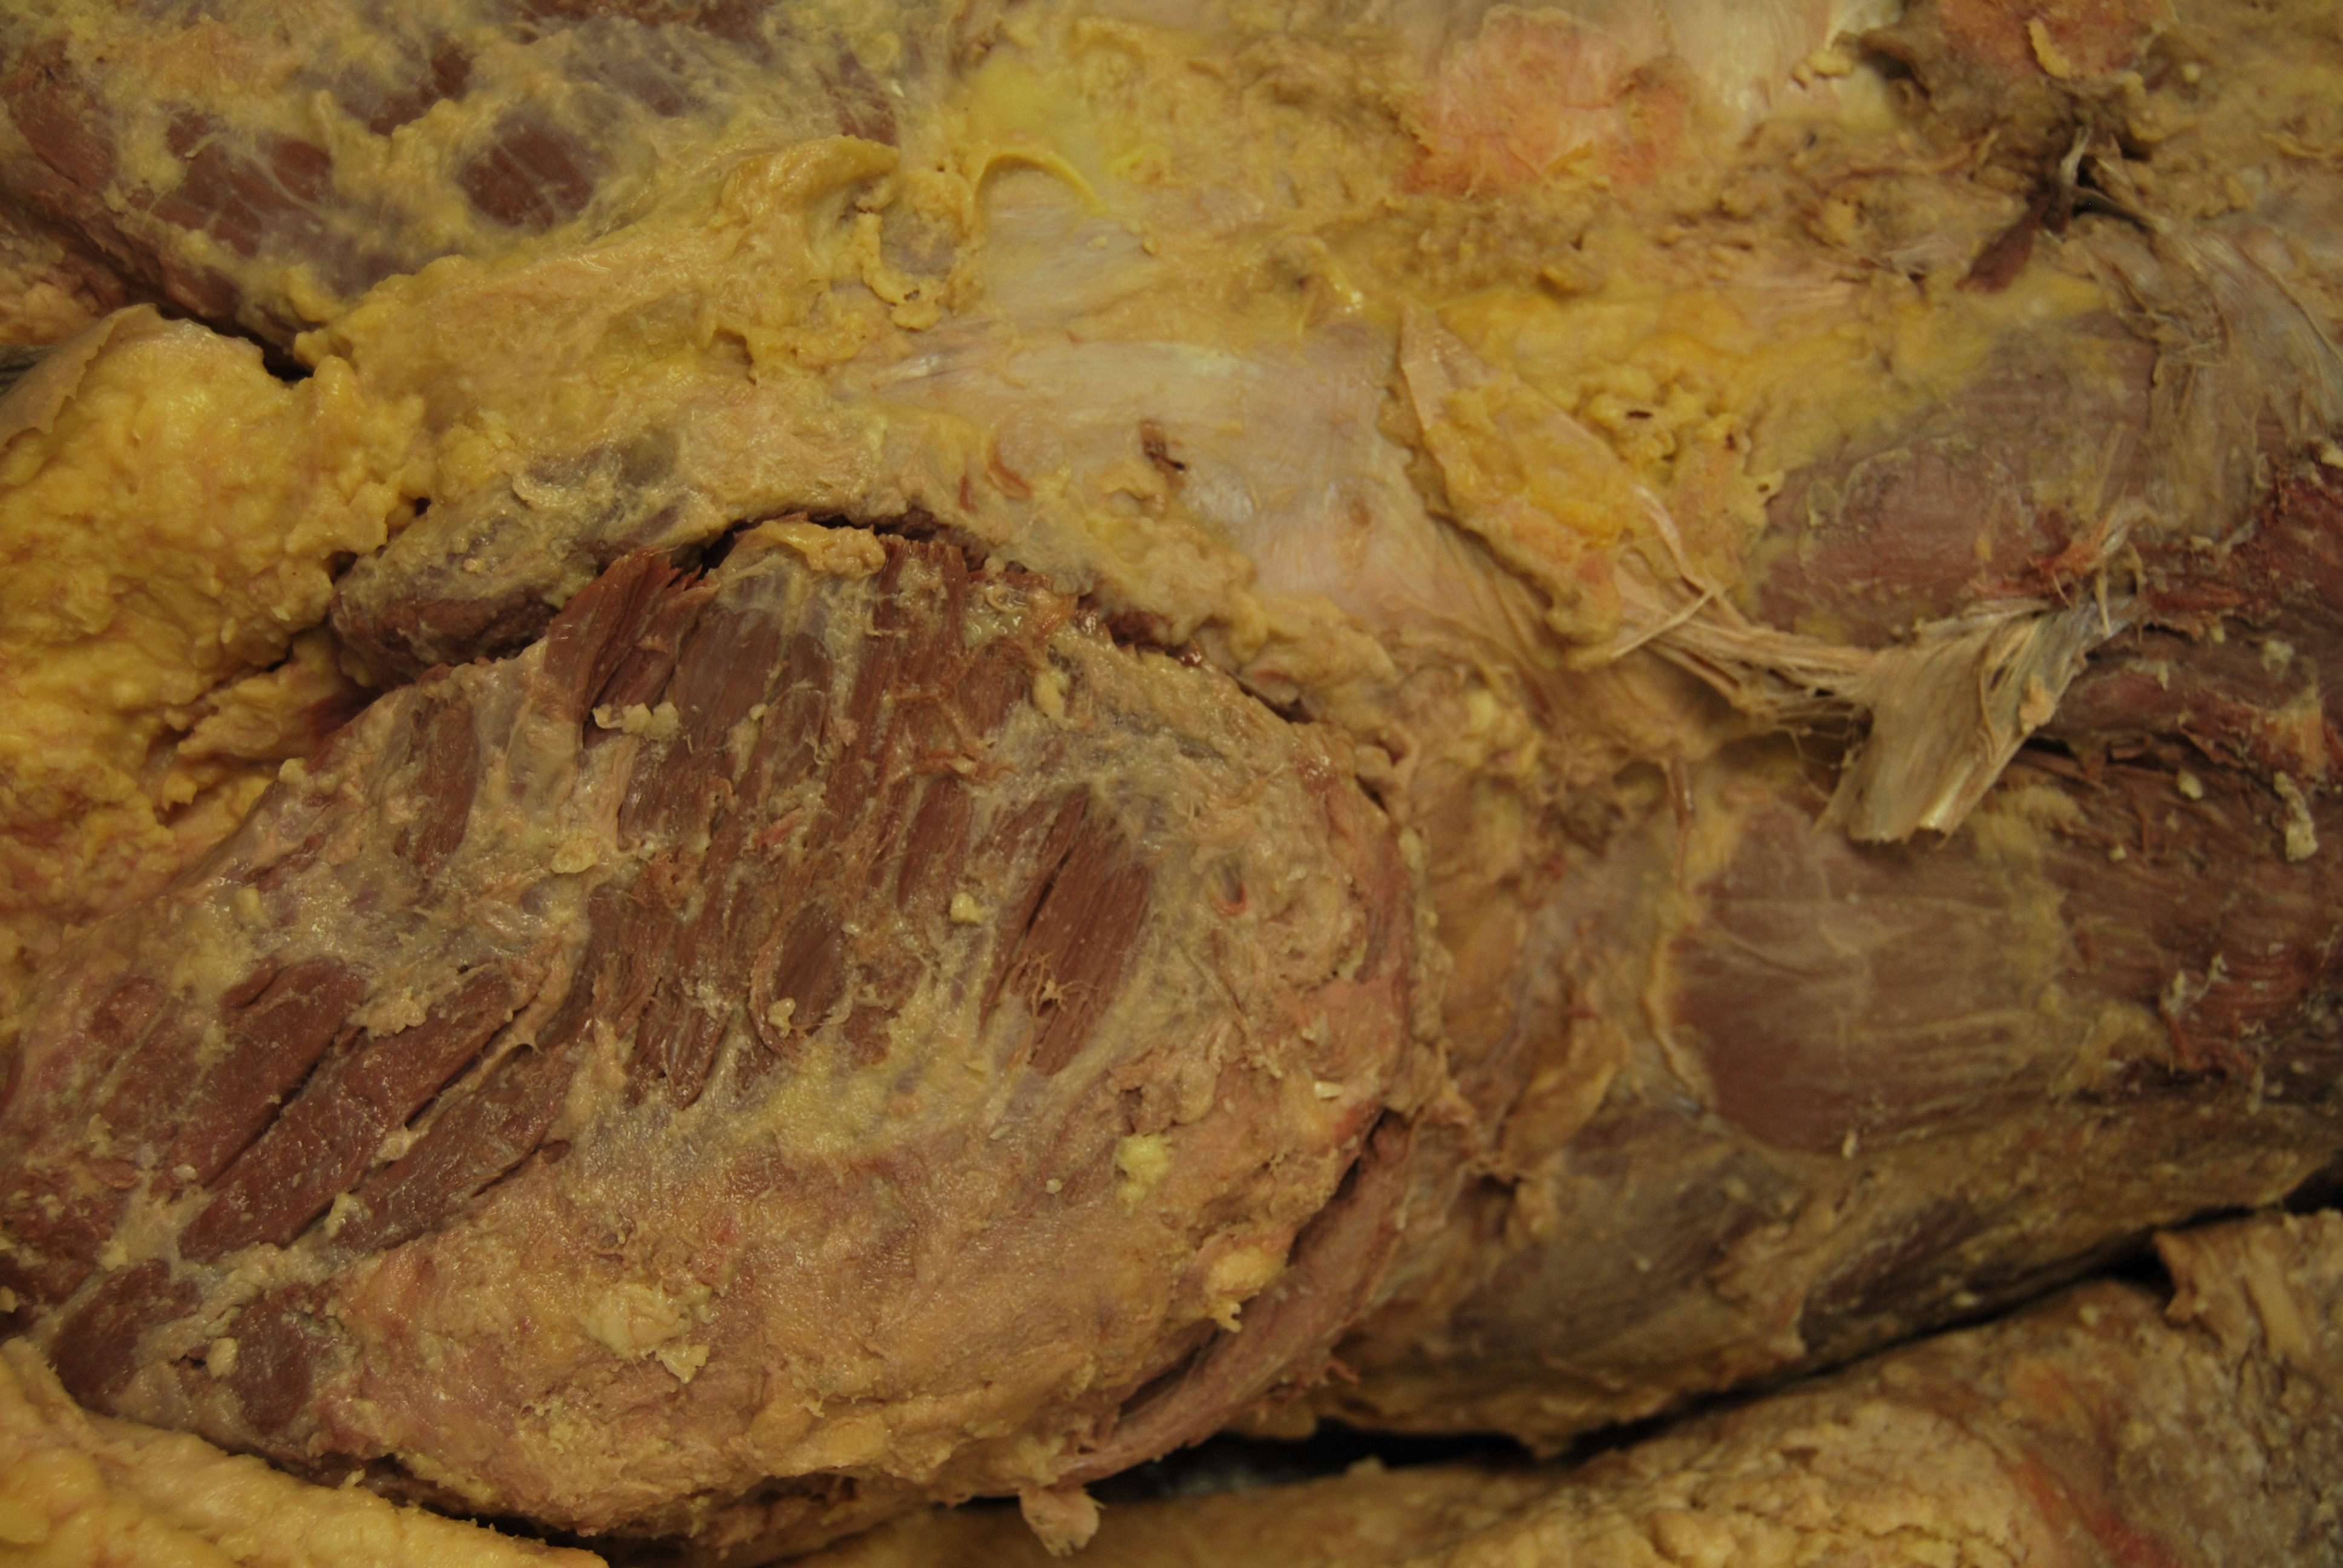
The cadaver pictures below display the orientation of the surrounding structures. Cranial is to the right in both images. With the Gluteus Maximus (GM) reflected from the origin, the sciatic nerve can be seen extending laterally somewhat as it descends and lays across the Quadratus Femoris (QF) muscle deep to it. The Ischial Tuberosity (IT) is to the left, and the Greater Trochanter (GT) is to the right. Consider the sonoanatomy with this image in mind. You should think of identifying superficially, the skin and subcutaneous tissue followed by one thick muscle and another muscle deep to it with the nerve sandwiched between these muscles. You should be looking for the change from one muscle belly to the next, then tilting the curved probe once you identify it to allow the sciatic nerve to be discovered at the right angle. Consider, as well, the pattern of spread the local should have as you inject. It should travel left and right in somewhat of a linear pattern. When you do not look to identify this plane between these two muscles adequately, you are likely to believe that the plane deep to the QF is your actual target as it tends to be easier to visualize. I will go over this again later, but let this image help to organize your thoughts of the sonoanatomy.

Although I did not have the insight to do this at the time I started doing this nerve block many years ago with nerve stimulation alone, I believe this particular nerve block does lend itself well to the step-wise incorporation of ultrasound into your practice. If you currently use a nerve stimulation technique, scan your patient after you have performed the block as you usually do. In fact, consider scanning before you perform your nerve stimulation technique as well. See if you happen upon the sciatic nerve and are able to use this information to find it easier with your nerve stimulation technique. You should be able to adapt your approach to allow you to add the ultrasound probe to what you are already doing since it does not require you to enter the skin from a different position as many other blocks do. Now let’s talk about how to do this block with ultrasound!
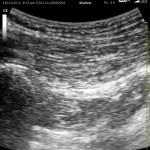
The view with a curvilinear probe is relatively simple. That is, if you are angling the beam at or above the base of the IT, there are very few things to try to recognize (a simple Archetypal view). Confirmation by observing local spread is straight-forward as well. If your probe is angled down toward the hamstring muscle origins on the IT instead of directly perpendicular to the patient’s skin, you will begin to get a more complex view. This is more critical in the Anterior Approach and will be discussed in greater detail in that section. Consider the Archetypal view and additional cartoon drawing below:


The probe will sit easily between the IT medially and the Greater Trochanter (GT) laterally, and the probe can ‘rock’ between these two points. First, identify these two structures at either side of your view. There will be[nonmember]…
REGISTER for FREE to become a SUBSCRIBER or LOGIN HERE to see the full article!
[/nonmember]
[ismember]
[wlm_ismember]
distinct bone shadows below due to the high density of bone. Sometimes it is difficult to keep both shadows on the screen in larger patients. The next thing to do is to generally see if a bright relatively flat structure (or two!) stand out to you by rocking the probe back and forth. Find the angle that produces the greatest beam reflection of what you believe to be the nerve. Next, look closely at the tissue layers from superficial to deep to try to distinguish the subcutaneous layer superficially from the Gluteus Maximus (GM) just below. Increasing and decreasing the pressure with your probe can help with this as demonstrated in the following video. Once you do this, all you have to do is follow the GM down to where it ends and the Quadratus Femoris (QF) starts. There will be a brighter line between these muscles due to the epimysium (outer fascial covering) of each of them. The sciatic nerve lies between these muscles.
The following ultrasound pictures demonstrated the difference in view when the probe is initially placed and then ‘rocked’ to slightly to see the sciatic nerve at a 90 degree angle to the probe. You can see the GT coming in at the left with darkness below it, and the IT can barely be seen on the far right.This is opposite to the cartoon drawings above. Look closely in the center from top to bottom to see if you can distinguish the layer of subcutaneous fat from the GM just below. Look deeper to notice the line (best seen in the first picture) of the deeper layer of the GM which ‘dips down’ a little between the GM and IT. This is the most critical cue to note. That line should contain the Sciatic Nerve, and deep to it is the QF. Once you have noted these findings, you should ‘rock’ the probe slightly to bring the Sciatic Nerve into better view. Note the bright areas deep to the QF toward the left and bottom of the picture. Those are not your targets. Now that you can appreciate the difference in the appearance of these various tissue layers, you should not be pulled off course. Remember, you are looking for a distinct border between the muscle fibers of the GM and QF.


When I started doing this block with ultrasound, I did not look well for this border between the GM and QF muscles, and I would get fooled into ‘blocking’ a bright tendonous structure deep to the QF which was probably the pectineus muscle (or above the QF medially which may have been the origin of the biceps femoris). The other confounding issue, especially when I didn’t appreciate the ultrasound clues I was given, is that it is not uncommon for the sciatic nerve refuse to stimulate even with 1.5 mA. It is more common with diabetic patients. This is one of the experiences that I’ve had that got me away from relying on stimulation and pushed me to learn the anatomy further, to take time to recognize the subtle (and sometimes not so subtle) cues that ultrasound offers and to trust my instincts once I know that I am certain of what I am visualizing. In retrospect, I feel like a fool for making such an error when it seems so clear now. I hope you will have similar experiences as you work to master these techniques so that you will realize as well that you are steadily improving and destroying barriers that once seemed insurmountable. Now, back to the block.
As an in-plane approach, you can bring your needle from the medial or lateral aspect. Ergonomically, I find it easier to come in from the lateral aspect. With an out-of-plane approach, bring the needle in at a very steep angle right up against the probe, and watch for tissue distraction as you slowly and steadily advance the needle either over the nerve or just to the side of it. Remember to release pressure on the probe as you enter the skin. Otherwise, your needle will actually travel parallel to the skin for some distance before it penetrates the deeper layers. It is more painful to the patient, and it will interfere with your needle path especially if you end up withdrawing and redirecting your needle. You will likely sense a ‘pop’ as you leave the epimysium of the GM. Keep the nerve stimulator off until you reach this point or just before to keep the twitching of the GM from distracting you and bothering the patient with the dramatic contractions due to direct stimulation of the GM.
Now, let’s say you absolutely know the structure you are adjacent to is the sciatic nerve. Your slow and steady advancement of the needle allowed you to observe tissue distraction even when the steep angle created a poor view of the needle (or better yet, you chose an out-of-plane approach with the same orientation you usually do when you use nerve stimulation alone…and you still used tissue distraction and a steady pace to follow the needle’s advancement) and yielded an obvious ‘pop’ as you left the GM into the space between it and the QF…but there is no twitch. Now what? We’re using ultrasound, so just inject and watch the spread of local. It should pool between muscle layers. If it appears in either muscle, adjust your needle accordingly, and press on. This approach allows you to ‘approximate’ the nerve and not drive ‘at’ it.
Watch the videos below. See if you can recognize the subtle ultrasound cues that will allow you to positively identify the Sciatic Nerve in both videos.
[/wlm_ismember]
See Also: The ‘Right’ Way